Miking Tips for Marimba in the Marching Band
There is nothing like the soothing yet upbeat sounds of a marimba to enliven any event. It is enough to invigorate the spirits of the crowd when their sports team is down big at half time.
How to Mic a Marimba for Marching Band? – It is essential to use Cardioid mics with shock mounts and use a placement underneath the instrument. Surrounding noise has to be avoided as best you can, whilst mounting below can pick up unwanted vibration hence the shock mounts. It is a very different scenario to miking a marimba for recording.
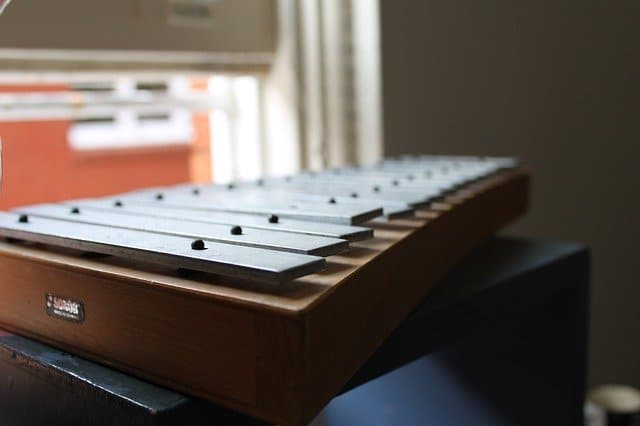
The marimba is a percussion instrument consists of wooden bars struck with yarn or rubber mallets to generate charming and comforting musical tones.
Originating in Asia, the marimba, which basically translates to a xylophone, was recreated by suppressed Africans in the 16th and 17th centuries. It was modified in 1850 from the old bow marimba to the wooden straight one, extending the legs so that it can be played in a standing position.
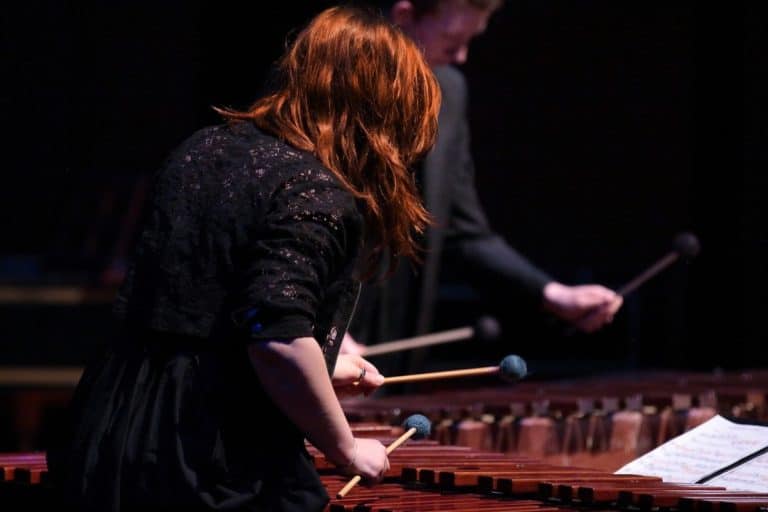
Often performed on by a single player, sometimes using four mallets simultaneously, viewing and listening to it being played is hands-down stunning.
That teeny weeny alteration worked for the best for the marimba as it became widely used by marching bands for festival parades and sporting events.
But since the marimba’s tune is quite cute, its tone was most of the time overwhelmed by the other instruments. Musicians through the years have been installing microphones and amplifiers to this instrument to magnify its contribution to the band.
Microphones for Marimba
There are many different choice of microphone that can be used from high quality and price which is where we start with the Neumann, down to more affordable options, that still retain great quality for marching band miking needs.
The Neumann U87AI
It is modeled after the vintage U87 which produces kind of a darker tone. The latest AI model sounds brighter and more fun.
The Neumann U87s consist of several designs with big diaphragm condenser microphones. Its flexibility, expansive frequency response, and precise diaphragms make it a favored marimba microphone.
The Neumann U87AI has a range of settings to choose from:
· Omnidirectional
· Cardioid
· Bidirectional (Figure-8)
The frequency response of the Neumann U87AI is listed as 60 Hz – 5,000 Hz, making it particularly precise in producing the tone and music of the marimba.
This range includes all the basic frequencies and most of the substantial harmonic content of this instrument. It displays an obvious increase in its upper frequency response, notably when the mallets hit the bars, which helps emphasize the marimba’s sound.
The U87AI possesses a sharp roll-off at its highest range which is critical when reducing an extremely bright and rough sound when it is recorded digitally. Its high-pass filter is devised to counter the effects of when the microphone is placed to the tubes too closely.
Sound technicians advise leaving a bit of space to allow the sound of all the tubes to be heard. It yields a signal depending on the microphone’s polar pattern that ticks when acquiring sounds from a distance.
Noticeable is the self-noise that the microphone makes which is caused by its electronics. But it can be adjusted depending also on its polar pattern. Unless it is set-up in a soundproof room, this self-noise can be noticed if you listen closely, but it is quiet enough not to strip the marimba off of its calming sounds.
The Electro-Voice RE20
[Price on Amazon]
At 10% of the price of the Neumann, the Electro-Voice RE20 has a light-weight diaphragm that performs well even with varying sound pressure levels and is not affected by the proximity of the microphone to the marimba.
Its Variable-D technology removes any signs of complications that arise depending on the distance between the microphone and the instrument, even performing better when placed on the bars or resonators, making it one of the most flexible microphones in the market.
The RE20, best planted near the instrument, is rated as having a frequency response between 45 Hz and 18,000 Hz, making it an excellent choice when you’re planning to record your performance.
The low-end roll-off frequency range allows the microphone to properly catch the sound while rejecting unwanted noise that may be present. On the other hand, the high frequency roll-off helps warm up the sound of the marimba in live or studio settings.
This can be an advantage when the mic is placed near the marimba since the sound of the bars when struck by harder mallets can be harsh.
Its ability to react to sound pressure because of its large diaphragm and the microphone’s capacity to block out self-noise make it a perfect choice for capturing details that are native to the marimba.
Warm Audio WA251
The WA-251 boasts a classic microphone design to a new generation of recording artists at a very reasonable price.
It became popular as a vocal microphone in the 1960s, is still broadly utilized, and is considered as one of the greatest condenser microphones ever. It consists of a large diaphragm that captures any sound that crosses its path and is a favorite for recording for pro studio, home studio, live, and broadcast applications.
It also sounds great on vocals, acoustic/electric guitars, acoustic/electric bass, drums, piano, strings, brass, and woodwind instruments.
A JJ 12AY7 vacuum tube, from the Slovak Republic, is used in the WA-251. It is enveloped with a WA-12-B-60V, an all-brass, circular capsule that records all the smoothness of the marimba. Utilizing a CineMag USA transformer, it supplies both the present top and large bottom end. Plus it boasts of polystyrene coupling capacitors, wima film capacitors, and a unique Solen French capacitor on its output. The WA-251 is a tube microphone that uses a 7 pin cable that connects it to its power supply.
The use of a 7 pin cable can be vital in some of the changes in the sensory of the microphone.
As mentioned earlier, it is more suitable for use in a recording studio but can be a huge boost to the sound even on outdoor or live performances.
The main purpose of installing microphones on marimbas or any other instrument is to increase its volume output. The well-known method to achieve high-quality, eardrum-popping levels is the use of amplifiers.
This can be quite taxing since for the Marimba, it requires customization for best results. Marimba amplification requires several small piezo ceramic transducer disks which are bonded to the nodal points of each bar. The nodal point is placed on an imagined line drawn by connecting the string holes in the bar. Using proper glue, the pickups are attached to the bar’s flip side on the outside end.
The transducers are then plugged into the whole tone and half tone rails. If installed correctly, the acoustic sound of the marimba shouldn’t be affected.
Amplifiers for Marimba?
3 Reasons for using an amplifier to help with marimba performance
- Better Sound Quality – Adding an amplifier can improve your sound by being a power source to get the best performance from your speakers without straining them. A factory stereo’s built-in amplifier is good but still not as good as the sound quality you can get from a separate aftermarket amplifier.
- Volume – This a no-brainer benefit. Outside noise like a car’s engine, the air conditioning in the room, your pet dog barking, or kids playing in the backyard can drown out the beauty of your favorite song.
- Power for Speakers and a Subwoofer – An amplifier can provide the power for getting optimal performance out of high-quality speakers. Subwoofers require much more power than typical speakers. Thus, a separate amplifier is necessary when adding a subwoofer.
Here is a list of the best amplifiers and their advantages for the marimba:
Marantz HD-AMP1 Digital Integrated Amplifier
- Boasts of superior-grade construction
- Gorgeous retro design
- Produces remarkable sound
Cambridge Audio CXA60 Integrated Amplifier
- Deep bass
- Amazing connectivity
- User-friendly
Yamaha A-S301BL Natural Sound Integrated Stereo Amplifier
- Awesome sound output
- Can be connected via Bluetooth
- Impressive construction
Pro-Ject MaiA My Audio Integrated Amplifier
- Stable design
- Dense sound
- Smart and packed composition
Onkyo A-9150 Refined Power Stereo Integrated Amplifier
- Awesome sound quality
- Flexible
- Easy to setup
The cons from the amplifiers on this list range from costing too much for too little features, to having too complex controls.
But most of them seem to be missing one very important feature – the ability to connect via Bluetooth.
We are treading the age of mobility, no doubt, so being capable of connecting wirelessly is of importance.
More Marimba Amplification Info
Now that we’ve discussed the best microphones and amplifiers that can help us make this project a lot easier, it’s time to get down to business. A marimba is a very large instrument, about eight feet long and can weigh over 200 lbs.
It is also known as one of the most meticulous instruments to mic or record. They are often used in a marching band or drumline ensembles, or in classical, symphony, and concert band settings.
They can be tracked individually or with an ensemble, and can be recorded live, in a studio or outdoors in, let’s say a parade.
Mic your marimba half-heartedly and it will produce a thin and powerless sound with a prominent and annoying stick noise.
When you’re set up in a studio or in a concert hall, there are a few techniques that you can follow in gearing up your marimba. Let us start with a setting when you only have access to one microphone:
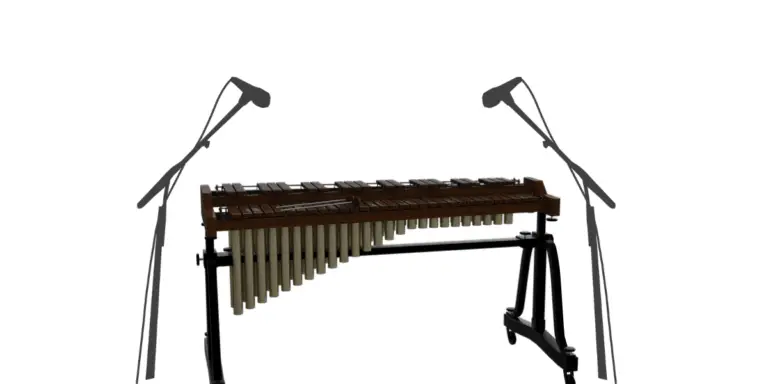
Try to establish a single large-diaphragm condenser microphone in front of and overhead the instrument in a way that from the microphone’s view, you would be looking down and forward at it. This arrangement should ensnare the best overall mix of the mallets striking the bars, and deep elaboration of the resonators.
Recording it with the use of a single microphone depends so much on the surroundings.
Here are some tips: move the microphone closer for a more intimate sound, and just a tad farther for more room sound. Remember that the output would depend on how properly you were able to place the microphone and if you are being joined by other instruments, just close your eyes, count on the proximity of your marimba to the other instruments, take a deep breath, and just play.
Using at least two microphones is standard practice when miking a marimba. Here are two favored options:
The first and arguably the most widely-used technique is to place a pair of powerful microphones at both ends of the instrument. Space it at about 4-8 feet apart depending on how much room sound you want in on your record.
The distance can be lower if you are going after a superior resonator sound, or you can place the microphones farther from each other for a more percussive style.
The second popular option is the use of condenser microphones. Not much difference with the preferred placements and distance between the microphones.
Experiment with X-Y configuration which is the use of two microphones that are planted right next to each other so that the diaphragms are as close together as possible without touching one another. It is the most routine microphone setup, one that is generally used is stereo miking.
You can also try the mid-side recording method where it doesn’t require a matching pair of microphones.
The drawback though is that one mic has to be cardioid and the other a figure 8. Mid-side recording requires that both mics are placed as closely as possible to each other and the sound is created only by the differences in loudness rather than time delays, which other stereo miking approaches depend on.
If you have an array of microphones at your disposal then go ahead and go crazy with them. Here are some recommended techniques:
Alternative Marimba Miking Techniques
Try a mix of stereo dynamic mics close to the instrument backed up by overhead condensers. You can also try placing the dynamic mics fairly low so they act as resonator close mics.
If you have it in your bag of tricks, this setup is perfect for maximum control over the sound that you will get, as well as the amount and presence of the instrument’s sound.
You can also control the tone by combining the warm resonators higher, or the cold percussive strike. Be mindful though of the microphone’s phase since when recording with throngs of mics they sometimes cancel each other out due to the sounds not reaching the microphones at the same time.
Make sure that the tracks are aligned and try to identify when the same percussion strike is hitting the different mics for a more powerful sound.
It is a whole different story when it is time for us to perform outdoors. The methods we have discussed above can do more harm than good since when playing in a marching band or a drumline, the microphones might pick up too much outside noise from the other instruments.
No question, playing with a large group in front of rabid and excited spectators gives us an adrenaline rush. Follow these simple steps on how to mic a marimba in a noisy environment for those ooohhh’s and aaahhh’s:
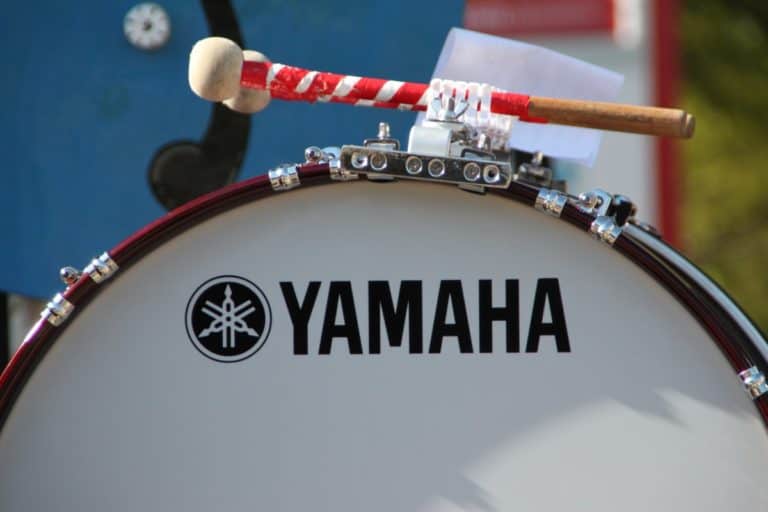
· Mic the instrument from underneath
- The number one technique is to install the microphones to the horizontal bar at the bottom of the frame the head pointing directly to the bars.
- Use specially designed clips to mount telescoping mic stands
- Make sure to use shock-mounts to reduce the risk of the microphone rattling and creating vibrating sounds.
- The mics should be pointed upwards at the keys.
- Placing the mics on the higher end if you are playing mostly in the middle, or lower if you are playing across the marimba.
- Follow the 3:1 rule, which is placing the second mic no closer than three times the distance of the first mic from the source.
Installing a microphone in a marimba is no walk in the park. Talking about it and assembling a how-to guide is way easier than actually doing it. But at the end of the day, we will never know how easy or difficult it really is unless we get our hands dirty.
Like what basketball legend Michael Jordan said, “I can accept failure, but I can’t accept not trying.”
Each song, instrument, and player is different so expect to run into several challenges especially when you mount microphones in a variety of settings. Trial-and-error is free, but in case you’re a heartbeat away from pulling off your hair in frustration, there are always professionals who would be more than willing to lend a hand.
Marimbas, though they are such enormous instruments, create the most soothing and elegant sounds. Whether on its own or paired with string, brass, and other percussive instruments, this mammoth of an instrument can create breathtaking music, may it be in the studio or live outdoor gatherings. The marimba’s roots are long and deep. Yet to this day, we just can’t seem to get enough of its beat.
![Best Percussion Instruments For Kids [That you can play too]](https://cdn-0.coolpercussion.com/wp-content/uploads/2020/09/woman-4010110_1920-768x512.jpg)