How to Make Your Own Wooden Tongue Drum
With a little knowledge and skill, it is possible for anyone to make a wooden tongue drum. A well-crafted instrument is not cheap to buy but you can attempt to make one yourself at a fraction of the price.
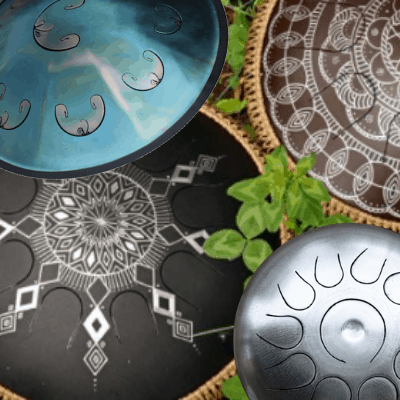
What is a wooden tongue drum? – The wooden tongue drum (synonym: slit drum) is a very authentic, qualitative wooden musical instrument that is originated from Africa, Polynesia, and Mexico. It comes in all kinds of shapes and sizes so there really is a very varied assortment.
The wooden tongue drum is a musical instrument that often gets overlooked, which is a shame because they have a rich history and is capable of producing a very deep and beautiful sound when the instrument is being used in the right manner.
Stuff you Need to Make Your Own Wooden Tongue Drum
- Band saw, jig saw or hand saw
- Wood chisel
- Drill
- Black marker
- Ruler or measuring tape
- Wood glue
- 4 Wooden boards (dimension: 450mm x 130mm x 20mm)
- 2 Wooden boards (dimension: 90mm x 130mm x 20mm)
- Sandpaper
- 2 Wooden dowels(length of ca. 300mm and a diameter of ca. 30mm)
- 2 Small bouncy balls (with a diameter of ca. 70mm)
- 4 Rubber feet
Are you interested in playing the wooden tongue drum, but do the high retail prices hold you back from purchasing one online or in a music store? Or have you just not found the wooden tongue drum yet that matches your specific preferences completely? Or maybe you just want to find your own creative outlet and you think crafting your own wooden musical instruments is the way to achieve that?
Whatever your personal reasons are, it doesn’t matter, you have come to the right place for your musical DIY-project! Read this article to gain insight into how you can make your own personal tongue drum and your own mallets.
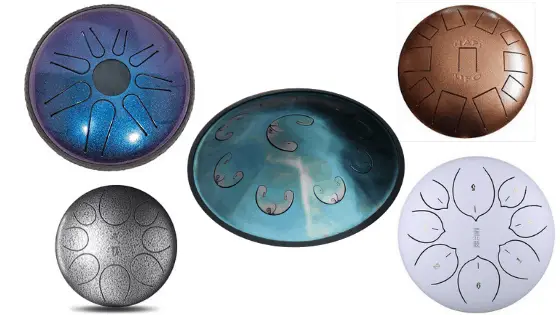
Tongue drums exist in many forms such as in the form of steel, but this article will teach you to construct a drum in the wooden form to further enhance the feeling of authenticity.
The best thing about this experience is that you can construct your own wooden musical instrument right from the comfort of your own home and just in the particular way you like it! You can do it at your own pace.
Now follows a step-by-step guide on crafting your own wooden tongue drum. Follow these steps all the way until you reach the tenth and final step and you will be able to play music on a wooden instrument that you will have made entirely from scratch.
Step-by-Step Tongue Drum DIY Guide
Warning: Your first tongue drum is not going to sound like a $500 pro produced instrument, but you will learn so much and hopefully have enough fun to try and try again until you perfect the process.
First step: assemble the acquired six wooden boards to put together the rectangle box for the wooden tongue drum. You can buy them online, but it’s better to see and feel the wood in person.
You can achieve that by buying the wood in specialty stores or from privet salesmen. The long boards will be used as the sides of the percussion box and the shorter boards will be the ends of the percussion box.
You are offered a lot of freedom when it comes to choosing what specific type of wooden boards you want for your wooden tongue drum so just choose what appeals to your own personal style the most. The only requirement is a certain level of quality.
There is a very big assortment of types of wood in the wood market, but if you don’t know which type to choose, there are some types of wood that you automatically should look out for. For example, wood types like
- Cedar
- Forest Oak
- Mahogany
All are adequate for constructing wooden musical instruments.
With those types, you can’t really go wrong and thus you are recommended to use them. If you are unable to find exact wooden boards with the above-mentioned dimensions, you can purchase big planks of wood and trim to the required dimensions. In that case, don’t forget to use your black marker and your ruler to determine the outline for your wooden boards, because that will make the job a lot easier.
Second step: Choose one of the four long wooden boards for this task, it doesn’t matter which one. Use your black marker and your ruler to draw a circle with a diameter of ca. 70mm in the middle of the wooden board.
Then, pick up your hand saw and follow the outline of your marker to saw the needed circle. Make sure the shape truly resembles the shape of a circle, because this is very important for the quality of the sound that your wooden tongue drum will eventually produce. Thus, accuracy is essential!
Third step: Pick up the wooden board that will be the top side of the wooden music box. Note that this is a different board than the one that you used to saw a circle into.
Look up the tongue pattern that you need for your wooden tongue drum. First, use your marker to draw the pattern onto the wooden board and once you’re finished, you can start carving the pattern into the wooden board.
The wood chisel is the most prominent tool that you need to fulfill this task, but you can also use a carving knife if you’re more comfortable with that.
If you have any trouble with fulfilling this task, it may be helpful to draw the pattern onto a piece of paper first before you actually transfer the drawn pattern to the wooden board.
That leaves some space for mistakes so it may help to ease your mind if needed to be. This step is very important because the pattern will eventually be responsible for the tuning of your wooden tongue drum and thus it’s responsible for the sound that your handcrafted instrument will generate.
The bottom line is that you need to be very careful while executing this step, or it may be so that you will have to start all over.
Fourth step: Grab the sandpaper and use it to smooth out the pattern on the wood. Sandpaper isn’t a scarce good, so you can basically find it wherever you go and in each and every DIY-store.
Don’t use too much pressure while wielding the sandpaper. Instead, use a prudent, light touch, because the wood will be particularly vulnerable after the carving is done.
Carry on with the sanding until every imperfection and bump is gone and the surface is perfectly even. This needs to be done for aesthetic reasons, but ultimately, it will also help with the tuning of your wooden tongue drum.
Fifth step: Look at the two shorter wooden boards and choose one of them for this step, it doesn’t matter which one.
Pick up the drill and use it to make two little holes in the middle of the wooden board. the holes should be next to each other with about 20mm distance between them.
Again, before actually drilling the holes, use your black marker to sketch the outline for where the holes should be on the wooden board. the width of the holes have to be the same width as that of the wooden dowels, so they should have a diameter of ca. 30mm. the reason for this is that the holes will be used to store your wooden drum sticks when you’re not using them. The practical use of these holes must therefore not be underestimated.
Sixth step: Gather your wood glue and use it to glue the six boards together until you’ve constructed a solid wooden box. Carefulness is truly a must, everything must fit perfectly and all the ends must add up!
Remove the excess wood glue and then, make sure to let the wood glue dry for at least a day to make sure everything is solid and secure.
Don’t rush the process because that will increase the chance of failure and having to start all over again. Better safe than sorry, so just wait it out!
If you’re still worried about the firmness of your wooden tongue drum, you can always add nails and screws to further secure that all the wooden pieces stay together.
Seventh step: Use the sandpaper to make all the edges of the box more smooth and to keep your wooden boards together. Apply pressure on the sandpaper with your hand and go back and forth over the surface of the wooden box a couple of times.
Continue this motion until there isn’t any unevenness left and everything is silky smooth. This will also increase the overall aesthetic factor of your wooden tongue drum. Smooth edges are easy on the eyes after all.
Eighth step: Assemble the four rubber feet and use the wood glue to stick the rubber feet to the bottom of your self-made wooden box.
Each rubber feet must go into a corner of the box. This will very much increase the quality of the sound of your wooden tongue drum. It will also provide extra protection and a better grip for your drums.
After gluing the rubber feet on the bottom of the wooden box, you must again remove the excess wood glue and make sure to let it rest for at least one day to make sure the rubber feet don’t come loose.
Ninth step: Now it’s time to make the drum sticks that are eventually used to generate the sound by banging them against your wooden tongue drum. This is not a hard task at all.
Or you could just buy some Mallets from the Glockenspiel mallet guide
First, you need to make a hole in each bouncy ball and the holes need to have the same width as the wooden dowels.
Again, use your black marker first to make sure that the dimensions are correct. That way the bouncy balls and the wooden dowels will fit perfectly in each other. Then, you need to use the wood glue to stick the bouncy balls to the top of the wooden dowels.
Again, let dry for at least a day to guarantee optimal security and to prevent the balls and the dowels from falling apart. After that, the drum mallets will instantly be ready to use.
Ps: working with bouncy balls is one of the many ways that you can construct a wooden tongue drum, so don’t feel restricted by this example. If you want to try other materials for the top part of the mallets, you should let your creative mind run wild if it can have the same desired outcome.
For example, you could use wool or other kinds of fabrics and shape it in the form of little balls and then glue them onto the wooden dowels. There are many possibilities, this is just one idea!
Optional Tenth step: You can decorate your wooden drum to match your personal style by painting it, by adding color to it, by writing stuff on it, by adding certain ornaments to it, etc.
That way, you can make your wooden tongue drum really stand out from other wooden drums and truly make it your own. There are a lot of possibilities here and you have a lot of freedom to create something that genuinely matches your preferences. Let those creative juices flow freely!
Saved Money!
Now that you personally handcrafted your wooden tongue drum, it’s time to talk about one of the greatest advantages of constructing your own musical instruments, namely all the costs you avoid by making the wooden tongue drum yourself.
You can save a lot of money this way, but the amount of money that you will ultimately spend depends on whether you already have access to the needed tools, namely the saw, wood chisel, and the drill.
Starting with the basis for your wooden tongue drum, it’s important to know that you can buy the wood you need for about 30$ to 50$, depending on the type of wood that you choose according to your own aesthetic preferences.
For example, plywood is a little bit cheaper than mahogany or cedar. For the mentioned amount of money, you will already be able to get your hands on some good quality wood.
The second needed item, sandpaper is really cheap and easy to find in general, if you don’t already own it. You can already buy some for about 2 to 4$ at the most.
The same price goes for the rubber feet for the bottom of your wooden drum. In specialized music stores, it’s possible that the price for the rubber feet will be a little bit higher, but if you keep searching, you’ll easily find cheaper ones.
Next up, there are the wooden dowels that are needed to create the hand-made drum sticks. You can basically get those everywhere since there’s no particular kind of wood they’re supposed to consist of. The best part is that you don’t even need to pay more than a maximum of 5$ for them.
Next on the list are the bouncy balls. They are also not very expensive seeing as the cost price ranges from 5$ tot 10$ at the most. You can find them in toy stores for kids or even in big supermarket chains.
Lastly, you need to purchase some kind of wood glue and that’s a product that you also don’t need to pay more than 10$ for. The brand of the wood glue doesn’t matter, as long as it works efficiently.
With a little bit of calculating work, the grand total for your handcrafted wooden tongue drum thus comes on a price of 55$ to 85$, depending on how much money you personally want to spend.
With a little bit of research on existing bargains, you probably can get the materials you need for less money or you can pay even more money if you want to further increase the quality of your wooden musical instrument, it’s your own choice!
That’s a big contrast pertaining to the overall current retail prices. Good quality wooden tongue drums easily cost several hundred dollars when you buy them online or at specialized music stores. That’s a lot of money so handcrafting your own musical instruments is definitely an attractive alternative.
However, keep in mind that if you don’t already have access to your needed tools, you will have to spend more money to obtain them from DIY-stores or salesmen online.
Frankly, those kinds of tools aren’t cheap, but the good news is that you are not absolutely required to purchase them. Specifically, there’s always the option of renting them for a certain amount of time. Even better would be if you have relatives or friends that are in the possession of these kinds of tools and are willing to lend them to you for the time that you need to create your personal wooden tongue drum.
What Are You Waiting For?
Voila, With the end of the article, you have reached the end of this guide! Get to work and start crafting your own wooden tongue drum. Once you have done that, you can start tuning your wooden tongue drum to be able to get that beautiful, authentic sound you’re really hoping for. With that, you’re fully ready to go and hopefully, you will become a true, authentic and self-made musician. Good luck!

![Hang Drum for Sale | Handpan & Tongue Drum Buying Guide [New]](https://cdn-0.coolpercussion.com/wp-content/uploads/2019/11/Hang-drum-for-Sale-768x384.png)